

Table of Contents
- What You'll Need Before You Start
- Smart Plug vs Smart Bulb for Lighting: Which Is Cheaper?
- Step 1: Pick Your Budget Lighting Approach
- Step 2: How to Sync Smart Home Devices Together
- Step 3: Smart Home Automation Scheduling Tips
- Step 4: Automate Home Lights Room by Room
- Common Mistakes to Avoid
- Conclusion
- Frequently Asked Questions
Last Updated: October 2, 2026
What You'll Need Before You Start
Here's the honest starting list:
- A smartphone or tablet to run the control app
- A stable Wi-Fi network (2.4 GHz band works best for most smart devices)
- At least one smart plug or smart bulb to test with before buying more
- A smart speaker if you want voice control (optional but worth it)
- Patience for the first setup, which usually takes 20-30 minutes per device
A common mistake is buying five brands at once, each wants its own app and account. Start with one ecosystem.
Smart Plug vs Smart Bulb for Lighting: Which Is Cheaper?
Smart plugs are cheaper because they automate any lamp you already own. Smart bulbs cost more per fixture but add dimming and color control without extra hardware.
Feature |
Smart Plug |
Smart Bulb |
|---|---|---|
Upfront cost |
Lower |
Higher |
Works with existing bulbs |
Yes |
No |
Dimming |
No |
Yes, on most models |
Color control |
No |
Yes, on premium models |
Best for |
Table and floor lamps |
Ceiling fixtures, ambiance |
Step 1: Pick Your Budget Lighting Approach
Automate the lights you actually use daily, not every fixture. Most households get 80% of the benefit from three or four automated lights.
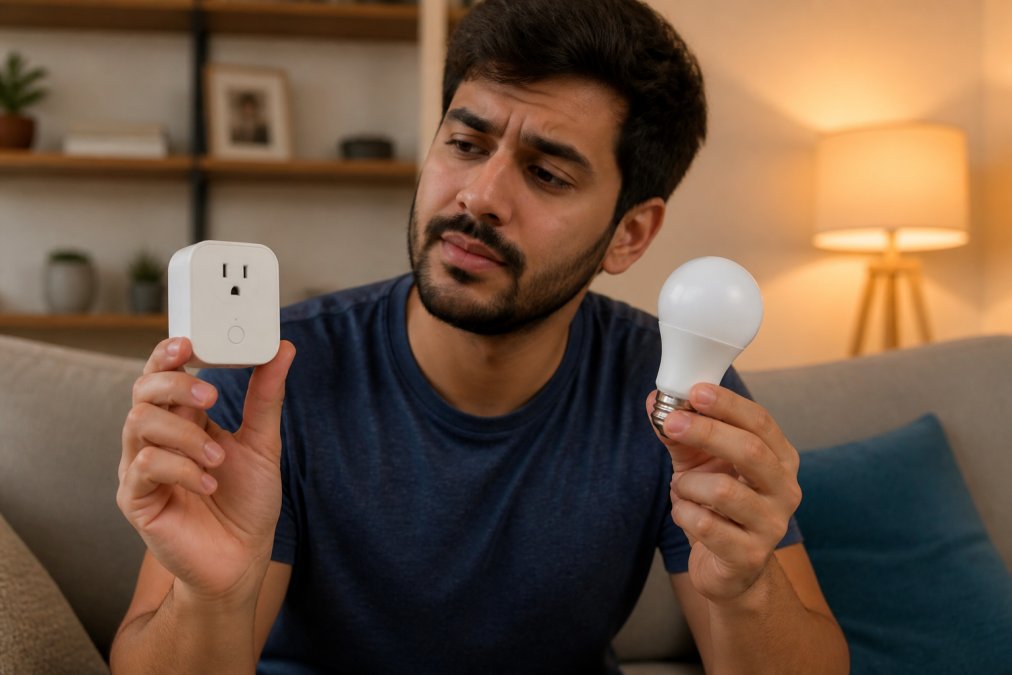
The Smart Plug Route
Smart plugs are the cheapest entry point: plug one into a wall outlet, plug your lamp into it, and control it from your phone.
- Works with any standard lamp
- No bulb replacement needed
- Easy to move between rooms
- No dimming or color options
The Smart Bulb Route
Smart bulbs replace your existing bulbs and connect directly to your network, costing more per unit but offering features plugs can't match.
- Dimming and color temperature control
- Scene creation for different moods
- No extra outlet needed
- Higher cost per bulb
Step 2: How to Sync Smart Home Devices Together
Syncing smart home devices together means connecting them to one app or hub so they respond to shared schedules and triggers. The goal is one control point, not five apps, and how you get there determines whether your setup still works in two years.
- A dedicated hub that speaks multiple protocols
- A voice assistant platform that connects compatible brands through one account
Wi-Fi vs. Zigbee vs. Z-Wave vs. Matter
The protocol your devices use matters more than the brand on the box. Here's how the four you'll actually encounter compare:
Protocol |
Hub needed? |
Bandwidth load |
Typical range |
Notes |
|---|---|---|---|---|
Wi-Fi |
No |
High (each device is a client) |
Whole home via router |
Simplest, but 20+ devices can strain a consumer router |
Zigbee |
Yes |
Low (mesh) |
~30 ft per hop, extends via mesh |
Common in budget hubs; 2.4 GHz, can interfere with Wi-Fi |
Z-Wave |
Yes |
Low (mesh) |
~100 ft per hop |
Uses sub-GHz band, less Wi-Fi interference, usually pricier |
Matter |
Sometimes |
Varies by transport |
Varies |
Cross-brand standard; runs over Wi-Fi, Thread, or Ethernet |
Do You Need a Hub?
A hub connects your smart devices to each other and the internet. You need one if your devices use low-power mesh protocols like Zigbee or Z-Wave instead of Wi-Fi.
Local vs. Cloud Control: The Angle Most Guides Skip
Cloud control means your command travels from your phone to the vendor's server and back. It works from anywhere, but depends on your internet and the vendor keeping that server online. When a budget brand shuts down its cloud, your "smart" plug becomes a dumb plug.
How to tell which you're getting before you buy:
- Search the product's support pages for "local control" or "works without internet."
- Look for hubs that advertise local automation processing (many Zigbee/Z-Wave hubs do; most Wi-Fi-only plugs do not).
- Check whether the app has an offline mode. If every button requires a login and a server ping, it's cloud-only.
Privacy and Data: What Cheap Devices Do With Your Information
Budget smart devices are cheap partly because the data is the product. Before committing to a brand, check three things:
- What the app asks for at signup. A lighting app that requests your contacts, precise location, or microphone access is overreaching. Deny anything not required for the light to turn on.
- Where automations are processed. Cloud-processed schedules mean the vendor sees when you're home and when you're away. Local processing keeps that pattern on your own hardware.
- Whether the vendor publishes a privacy policy you can actually read. If there's no policy, assume the worst and pick a different brand.
A hub that routes every command through a vendor cloud is a single point of failure for both reliability and privacy. If the vendor changes terms or shuts down, you lose control of hardware you already paid for. Matter certification and local-control support are your two best defenses.
The DIY Route: Home Assistant and Open-Source Hubs
If you're comfortable tinkering, open-source hub software like Home Assistant runs on a cheap single-board computer or old mini PC and controls Wi-Fi, Zigbee, Z-Wave, and Matter devices from one local dashboard. It's the strongest anti-lock-in move on a budget, since no vendor can shut it off. The cost is time: an evening or two of setup plus occasional maintenance.
Step 3: Smart Home Automation Scheduling Tips
Scheduling is where automation earns its keep. A light that turns on at sunset and off at bedtime saves daily hassle, but the difference between a schedule you set once and one you fight weekly comes down to a few mechanics.
Start with three schedules:
- Morning: lights on at a set time or sunrise
- Evening: lights on at sunset
- Night: lights off at bedtime
Sunrise and Sunset Offsets
Most apps let you anchor a schedule to sunrise or sunset with an offset in minutes, the most useful scheduling feature for budget setups, keeping lights in sync with the seasons without manual adjustment.
RGB Multi-Color LED Smart Bulbs →
A few offsets that work well in practice:
- Evening lights: sunset plus 15-30 minutes, so lights come on as natural light fades rather than while it's still bright.
- Morning lights: sunrise minus 20-30 minutes, so the house is lit before you're up.
- Porch or entry: sunset to sunrise, which is the classic dusk-to-dawn pattern and needs no fixed times at all.
Conditions, Not Just Times
A schedule that fires on time alone ignores context. Better apps let you add conditions that must be true for it to run:
- Only if the light is off (prevents toggling a light you already turned on manually)
- Only if someone is home (via geofencing, below)
- Only between certain hours (stops a motion trigger from firing all night)
- Only if another device is in a given state (e.g., TV off, so the room dims for reading)
Geofencing: Lights That Know You Left
Geofencing uses your phone's location to trigger automations when you arrive or leave. On a budget setup it improves the experience most per dollar, eliminating the two most common manual actions: turning lights off when you leave and on when you get home.
How it works in practice:
- You draw a boundary around your home in the app.
- When your phone crosses that boundary, the app fires the automation.
- You set the action, all lights off on exit, entry light on at arrival after sunset.
Vacation and Randomization Schedules
A schedule that turns lights on at exactly 7:00 p.m. every night is a signal, not a deterrent. Most apps include a randomization or "away" mode that varies times within a window, lights on between 6:45 and 7:30 p.m., off between 10:30 and 11:15 p.m.
Don't schedule every light in the house to the same randomization window. Two or three lamps on staggered windows reads as a lived-in home; ten lights flipping in unison reads as a timer.
Voice Control and Remote Access
Voice assistant integration lets you control lights hands-free, once linked, say "turn off the living room lights" and skip the app.
If your only way to control a light is a voice assistant or a remote app, you've built a single point of failure. Keep at least one physical switch or local button in the loop for any light you actually depend on.
Step 4: Automate Home Lights Room by Room
Room-by-room automation keeps your setup manageable and spending controlled. Automate one room per week instead of the whole house at once.
Common Mistakes to Avoid
Other mistakes worth avoiding:
- Ignoring Wi-Fi signal strength. A plug in a far corner may drop connection constantly. Test one device in each room before buying more.
- Skipping firmware updates. Updates fix connection bugs and add features. Set them to run automatically.
- Over-automating. Ten schedules you never use are worse than three you rely on.
- Mixing ecosystems carelessly. Every new brand means another app and another account.
Buying the cheapest device on the shelf often means no firmware updates and no support. A device that stops working after six months isn't a bargain. Check that the brand still updates its app before you commit.
For shoppers comparing prices, Myriad Mart carries smart home accessories alongside everyday essentials.
Conclusion
The real challenge with budget lighting automation isn't cost. It's picking devices that still work together two years from now, when the cheap ones have dropped off your network.
Frequently Asked Questions
How can I automate the lights in my house on a budget?
Start with smart plugs, which cost less than smart bulbs and work with lamps you already own. Plug your lamp into a smart plug, connect it to your Wi-Fi through the manufacturer's app, and set a schedule. A single smart plug can control any standard lamp, and you can add more plugs over time as your budget allows. This approach keeps upfront costs low while still giving you scheduling, remote access, and voice control.
Do I need a smart hub to automate my lights?
Not always. Many budget smart plugs and bulbs connect directly to your Wi-Fi network and are controlled through a mobile app, so no hub is required. A hub becomes useful when you want to sync devices from different brands or use advanced automation triggers like motion sensors. If you plan to build a larger smart home ecosystem later, a hub-based system can help with interoperability, but you can start with Wi-Fi devices and add a hub when needed.
What is the cheapest way to start smart lighting?
Buy a two-pack of Wi-Fi smart plugs and use them with lamps you already own. This avoids the cost of replacing every bulb and lets you test whether automation fits your routine. Pair the plugs with a free voice assistant app on your phone, then set schedules for morning and evening. Once you confirm the setup works for your space, expand one room at a time with additional plugs or a few smart bulbs for dimming capabilities.
How do I sync smart home devices together without spending much?
Choose devices that support the same voice assistant, like Amazon Alexa or Google Assistant, and connect them through that app. Most budget smart plugs and bulbs work with both. In the assistant's app, create automation routines that trigger multiple devices at once, such as turning off all living room lights at 11 p.m. If you mix brands, check that each device supports the same platform before buying to avoid compatibility issues.
